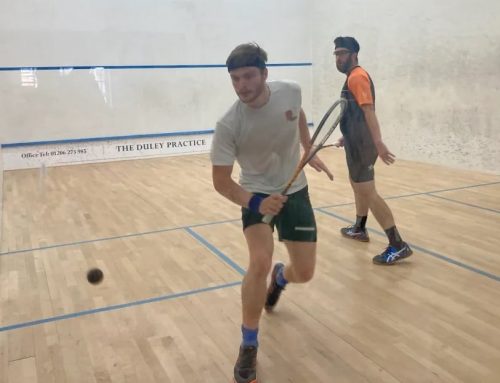
For many players the backhand is often the weaker stroke. This is because the backhand has to develop the majority of its strength from technique alone, unlike the forehand which can initially obtain a lot of raw power from the larger muscle groups applied.
On the backhand side players will often develop bad habits very early on, usually caused by trying to cheat the system and find a quick fix or short cut to some sort of success.
Placing a second hand on the racket like Rafael Nadal is one version I come across and not just with juniors. This supporting hand initially gives a player some added strength to manoeuvre the racket towards the ball but unfortunately in squash has all sorts of major drawbacks: a shorter reach; reduced leverage, swing speed and power; fewer choices of shots from fewer positions and greater energy consumption are just some of the many huge disadvantages. ‘Well it worked for former England and world number one Peter Marshall’, I hear you say. Well my response is one in ten thousand professionals is not a strong case even if he did thrash me a couple of years ago!
Many of us ‘aching and aging’ players from the 1970’s and 80’s squash boom Peter Marshall included, started squash either as adults or juniors using wooden squash rackets prior to the invention of aluminium and then graphite. This left many of us with no choice but to use two hands just to lift it off the floor, it was a common site across clubs to see an eight year old wielding a 200g head heavy Dunlop max ply like it was Excalibur! Ninety nine percent of us either had it swiftly coached out of us or evolved in to using one hand as we grew physically and technically stronger. Also racket manufacturers began experimenting with lighter materials developing lighter rackets.
Another major technical issue on the backhand side I occasionally come across in beginners and club players is the ‘breaking of the wrist’. No, this doesn’t literally mean players having to visit A & E for an X-ray after every match. Breaking the wrist refers to a point in the backswing when instead of keeping the wrist cocked, flexed, strong and stable a player takes it upon themselves to collapse at the wrist and in turn develop a floppy wrist flick towards the ball as opposed to developing a full and proper swing.
In my 20 plus years of coaching I have found this to be one of the worst habits a player can develop. Breaking the wrist on the backhand backswing swing will potentially lead to a multitude of problems: significantly less power; timing and accuracy issues (especially when trying to hit straight); fewer shot options; loss of racket head stability and ball control; crowding the ball (getting to close); a poor follow through; persistent wrist injury; tennis elbow or similar forearm and elbow pain. Worst of all it is one of the most difficult bad habits to cure and because of this reason it often doesn’t get cured at all.
I requested back in article one that you try to imagine learning squash like reading from a book. Identifying, practicing and perfecting things in the appropriate relevant order chapter by chapter. Not breaking the wrist, making sure it stays flexed and strong in the backswing, is a habit that can be formed and ingrained in chapter one whilst working on the grip. Once again I advise using small chip shots where technique rather than power is the main focus.
Ingraining the correct grip and swing technique has got to be the priority for any player young or old learning to play squash or alternatively as I’ve said in previous articles your progress may slow or even come to a standstill further down the line unless of course you are prepared to go back and revisit chapter one.
When children begin to come along to junior squad sessions, coaches get them to stand one or two metres from the wall (any wall) and practice their chip shots over and over again, session after session, forehands, backhands, alternating, volleying all played from one or two metres from the wall. Through this method the focus is more on ingraining control, accuracy and technique, not power, that will naturally develop later with time.
If an adult or teenager turns up to play their buddy (not a coach) once a week, they will both stand pretty close to the back wall on their own side and knock up together. For a beginner to get the ball from your own back quarter to your opponents back quarter requires a fair amount of force. The players haven’t yet formed the technique required to get effortless natural power so what do they do? They find a way, often developing an unorthodox technique to short cut their way to forcing the ball over this distance. I guarantee the guy on the backhand side will pretty soon start to collapse and break the wrist on their backswing in a vain attempt to fling the racket head at the ball and get the power required for the task. If a player does break their wrist to achieve this and repeats this technique over and over again, shot after shot, week after week turning up to play their buddy, they will have formed breaking the wrist as habit. They will no doubt in the future have most of the issues previously mentioned and require several sessions with a coach (and physio) to try to repair the damage.
So how do we correctly hit our backhands and what is good technique on the backhand side? As with the forehand stroke in article 3 let us once again use the ‘whole part whole’ method breaking down the backhand swing into parts: back swing; down swing; contact and follow through.
When taking the swing back in preparation to hit your backhand drive think primarily about the elbow. Begin by rotating at the hips and tilting down towards the ball slightly, keep the elbow low. Take your elbow across your tummy towards the belly button, whilst also cocking the wrist and taking the racket handle towards the opposite shoulder. A great tip to help players achieve this is to try and get your racket arm shoulder to touch your chin. This sounds like a lot of components but don’t worry it all happens together in one fluid movement.
In this coiled position, poised and ready to strike, you should be compact, your elbow and handle should be a few inches away from the belly button and shoulder respectively. Your racket head should be just hiding a little behind your own head, do not rest it on your shoulder and hopefully you still haven’t broken your wrist.
The position you are now held in, many coaches refer to as the diamond. This is because the elbow, the hand, the shoulder and finally the racket head should create a diamond shape if drawn around. It is worth also mentioning at this point that the non racket arm should be under the racket arm, not above. Be sure to engage your non playing arm in the backhand stroke as it plays an important role in swing symmetry, creating space, balance, stability and recovery back to the T. It should not be asleep.
Once you are held in the diamond position you can focus on addressing the ball, adjusting your feet, creating space and choosing when to begin your downswing. Before starting the downswing it is imperative you get your distance from the ball correct, do not get too close. If you crowd the ball you will have to compensate, this may mean breaking the wrist to make the swing smaller. Your arm will also struggle to fully extend therefore reducing leverage and power as well as ruining the follow through and shot accuracy. The compensation will most likely also close the angle of your racket head, you will also be unable to bend the knees and strike under the ball. Test yourself to see how far away from the ball you can be when hitting a backhand, take this right up to the point just before it becomes detrimental.
Providing you have your distance to the ball correct you can begin the downswing, unwinding the coil, rotating back towards the ball, returning your elbow back towards your hip, un-cocking the wrist and whipping the racket head through.
Upon impact lock out the elbow and un-cock the wrist. Practice this in slow motion without a ball, when you look down you should see a nice straight arm upon making your lever as long as possible. At this point I will also remind you about my tip in article 3 to ‘keep your head still’, watch the ball onto the strings. Exaggerate this to help eliminate miss hits, frame shots and premature string breakages around the edge of your racket head.
Now simply hit through the line of the ball and naturally follow through up towards the ceiling. Do not roll the hand over allowing the top edge of the racket to overtake and apply topspin to the ball, bottom edge leads. Try to maintain a still head, with your eyes looking down at the impact and throughout the follow through before finally lifting your head and using your momentum to lift yourself away from the shot and back towards the T.
Ultimately your backhand is highly unlikely to end up as powerful as your forehand even if you become a professional. As your level hopefully progresses you will also notice an increase in the amount of play that goes up and down the backhand wall not to mention pretty much every ‘hand out’ return of serve, therefore focus less on power and more on developing good technique, accuracy and consistency.
‘A consistently accurate backhand is a greater weapon than a powerful one.’
Look out for my next article on ‘tactics’. I will be splitting this into two separate articles starting with the basic tactics and then returning again at a later date to look at more advanced tactics.


